How to use KUSANAGI on Alibaba Cloud
This guide assums you have an account with Alibaba Cloud and able to access the Alibaba Cloud Console. Alibaba Cloud Console: https://account.alibabacloud.com/login/login.htm
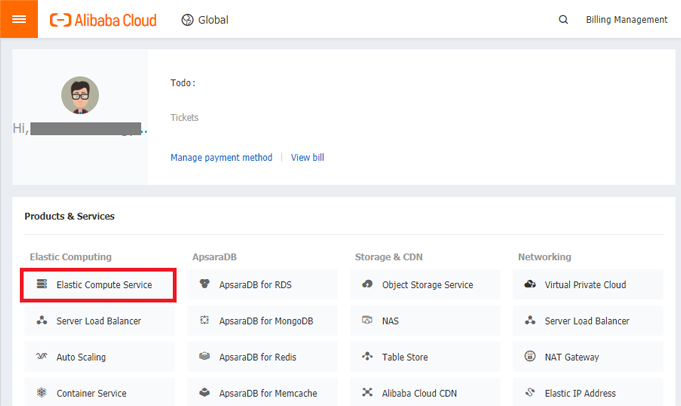
1.Create instance
Click Elastic Compute Service under Virtual Server “Products and Services” in the console.
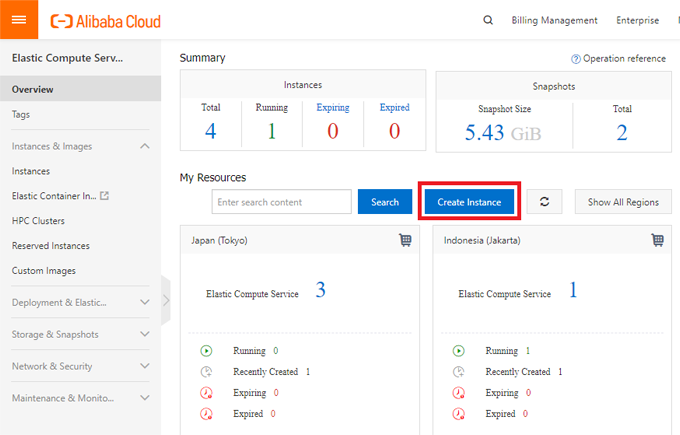
You will see a list of currently active instances. Click the Create Instance button in the middle of the screen.
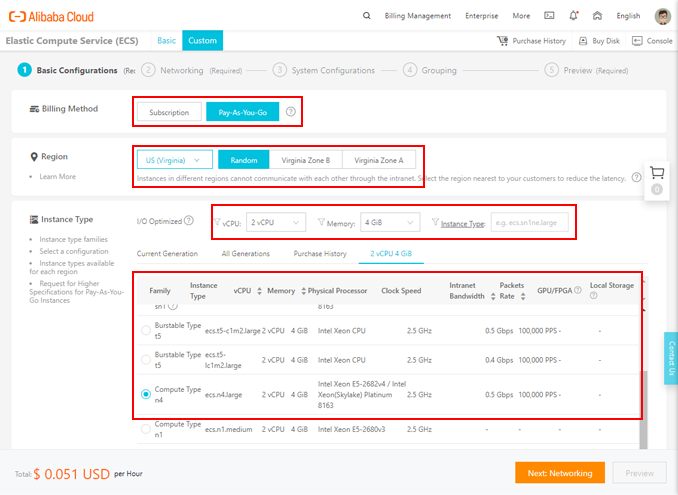
On the following instance creation screen, choose the Billing Method, Region, and Instance Type.
*The available instance types may change according to the region you select.
2.KUSANAGIの選択
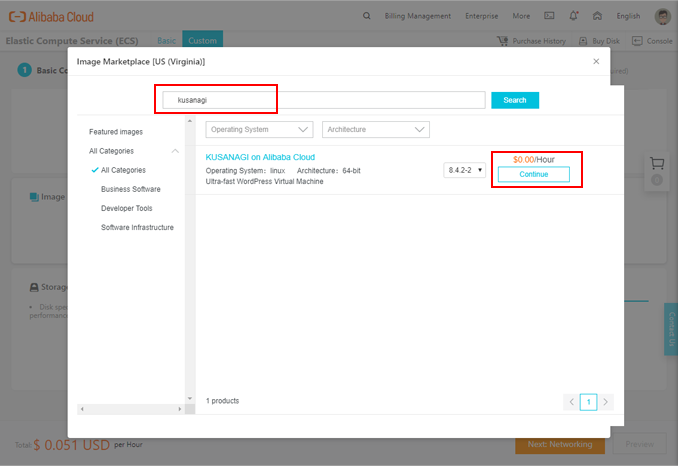
Select “Marketplace Image” on Image section and choose “Select from image market”.

Search “kusanagi”. “KUSANAGI on Alibaba Cloud” shows on the screen. Choose “Continue”.
Check that the selected image is KUSANAGI on Alibaba Cloud. After selecting the storage, click “Next Step: Network”.
3.Other settings
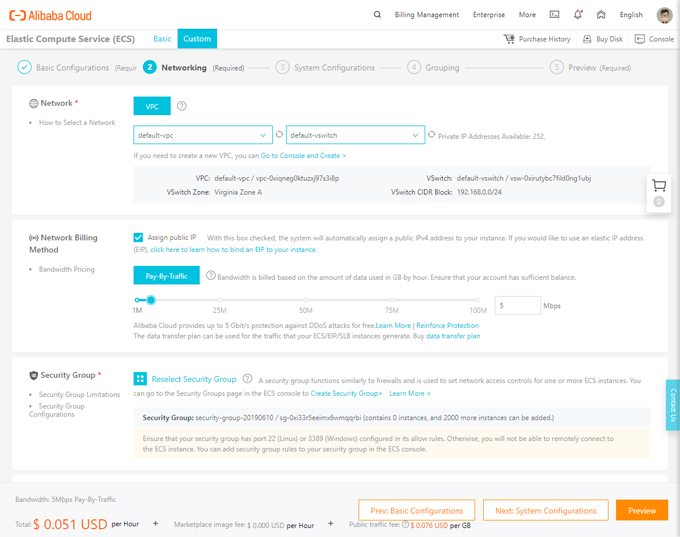
Confirming “Network”, “Network Billing Method”, and “Security Group”. Click “Next System Configuration”.
*Please check open port on the security group.
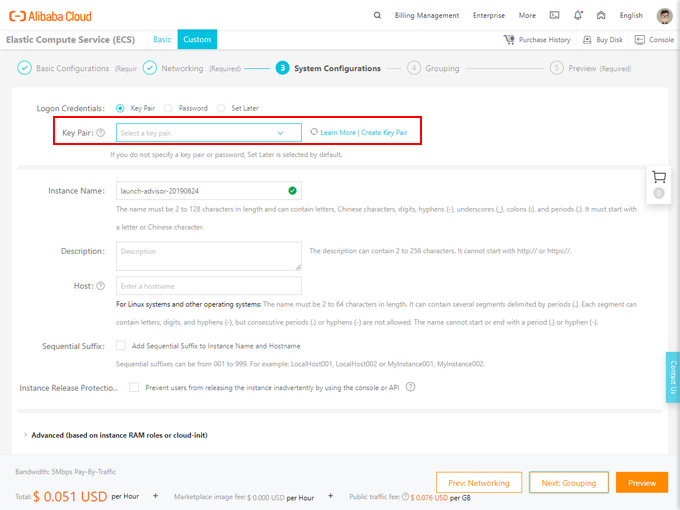
Select a key pair. If it is new, click “Create Key Pair”.
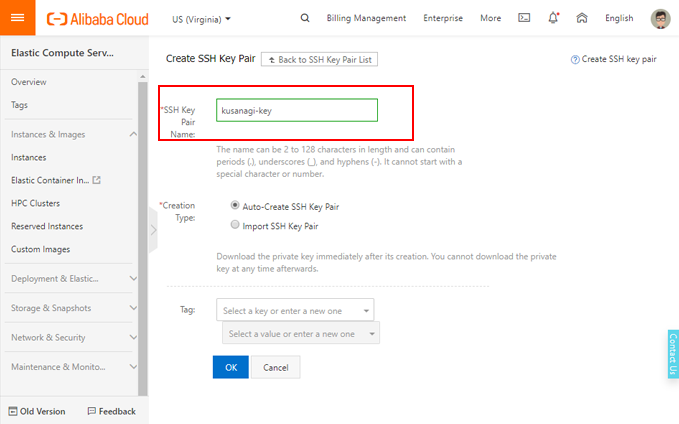
Enter the key pair name and click OK.
*Click OK and the key file will be downloaded.
Return to the previous screen. Click “Next Step: Group”.
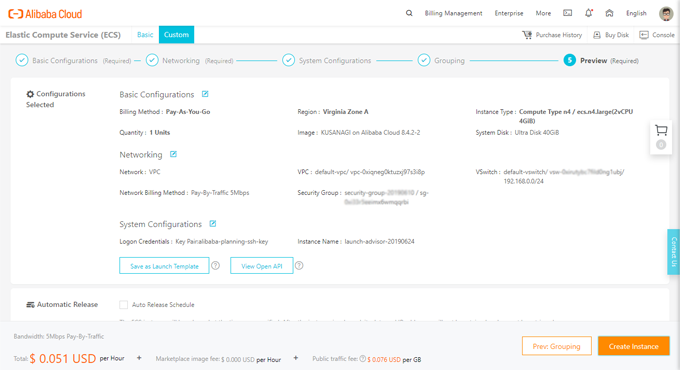
Click “Next Step: Preview”.
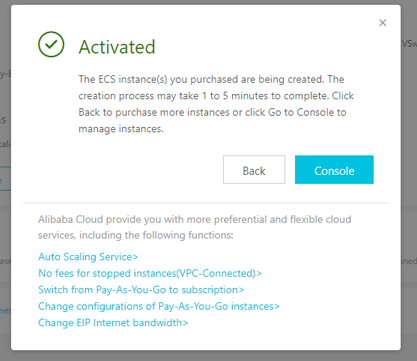
4.Create Instance
Confirm that the created instance is correct and click “Create Instance”.
Instance creation begins and wait to finish.
5.Check the created instance
Return to the console and confirm that one instance has been added to the instance confirmation screen of the “Products and Services” > Elastic Compute Service.
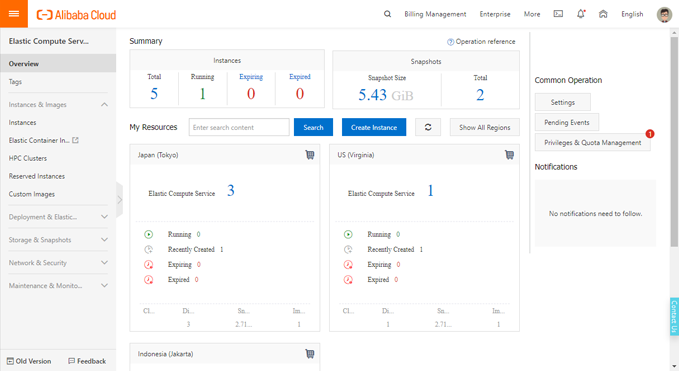
Click the instance ID, and confirm the details of the instance.

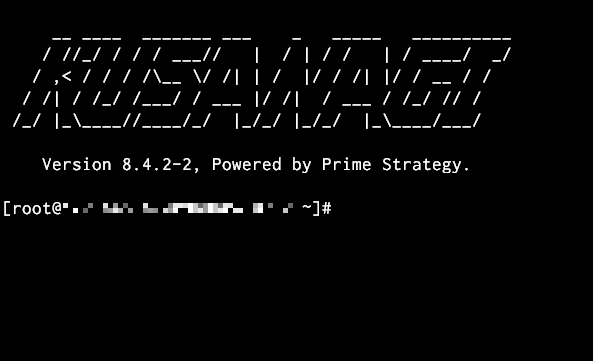
6.Log in to the virtual machine and prepare for initial setup
Log in using SSH client software based on the login information set when creating the instance and the IP address. If login is successful, the following screen will be displayed.
For instructions on initialization please see the following guide.