IBM Cloud
KUSANAGI for IBM Cloud is a free virtual machine image built to execute WordPress at high speeds on on IBM Cloud.
System requirements: minimum 4GB memory
How to use KUSANAGI for IBM Cloud
* This guide assumes you have an account with IBM Cloud and are able to access the IBM Cloud Customer Portal.
1. Search for and order VM image
a. Search for the VM image
Search the list of Public Images for KUSANAGI for IBM Cloud.
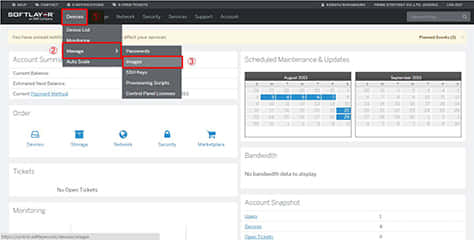
Log in to IBM Cloud’s Customer Portal.
On the top menu, hover over “Devices”, then “Manage”, then click “Images”.
The following screen will display.
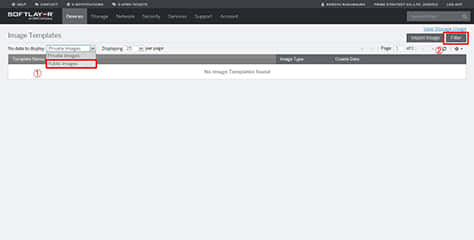
Select “Public Images” from the drop down menu under “Image Templates” and click “Filter” on the top right.
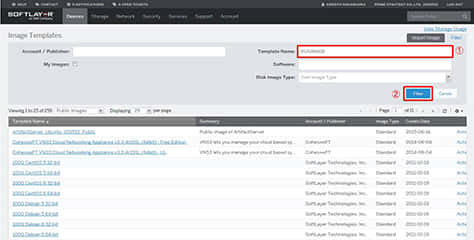
Enter “KUSANAGI” in the Template Name field then click the blue “Filter” button.
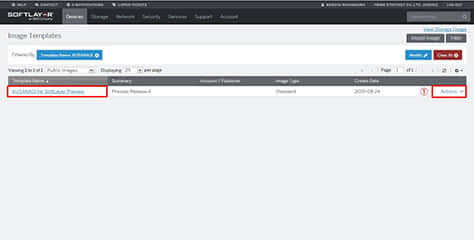
Once KUSANAGI for IBM Cloud is shown, click “Actions” on the right side of the row.
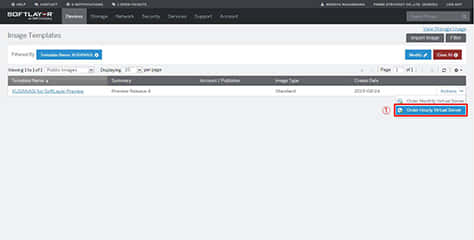
Click “Order Hourly Virtual Server”.
b. Order the virtual machine
The “Configure” screen will display.
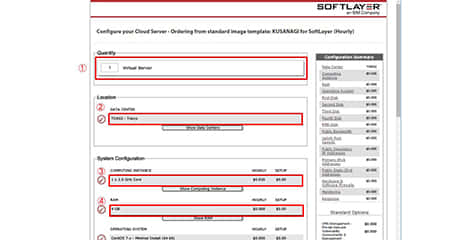
- Quantity: Specify the number of virtual servers. Generally enter “1”
- Location: Specify the data center where the virtual machine will be located
- COMPUTING INSTANCE: Specify the number of CPU cores
- RAM: Specify the memory size. System requirements for KUSANAGI for IBM Cloud are 4GB or more
- Finally, click “Continue Your Order” at the bottom of the screen.
Then the “Order Summary and Billing” screen will display.
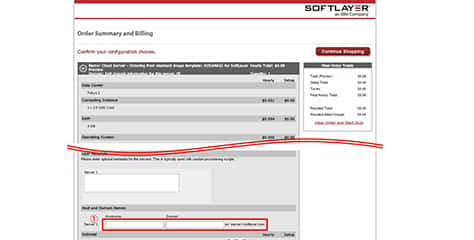
Enter the host name of the virtual machine in “Host and Domain Names” near the middle of the screen. Check the box that you have read the service agreement and click “Finalize Your Order”
* The host name entered in this step can be changed later from the Customer Portal. If the domain or other details are yet to be decided, you can enter a temporary name in this step.
If the “Your Receipt” screen is displayed, then your order is completed. Close the popup screen and return to the Customer Portal.
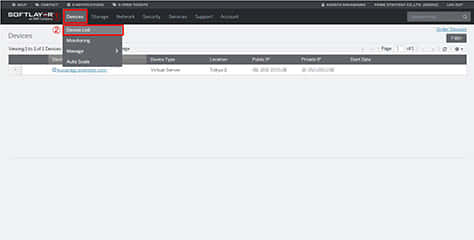
On the top menu, hover over “Devices”, then click “Device List”.
Configuration of the ordered virtual machine will begin.
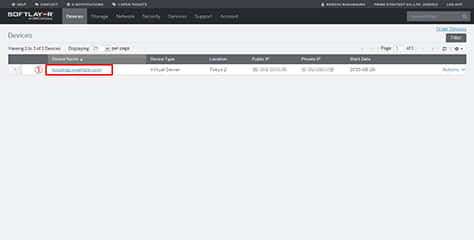
After configuration, the virtual machine will start up and the clock icon on the left side of the device name will disappear. If the clock icon does not disappear after 4 or 5 minutes, please refresh the page.
c. Confirm your SSH login information for the virtual machine
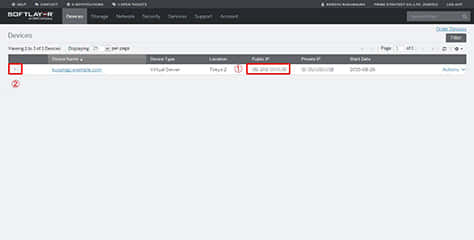
- Make note of the Public IP of the virtual machine.
- Click the arrow on the far left side of Device Name to display the details of the virtual machine.
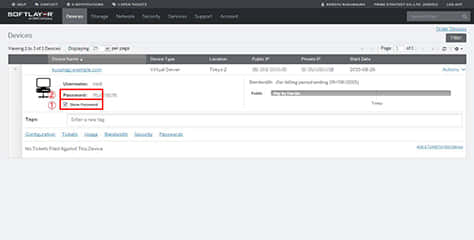
Check the box “Show Password” to show the root password. Make note of this password since it will be used to log in by SSH.
2. Log in to the virtual machine and prepare for initialization
Below we will explain how to log in to your virtual machine in preparation for initialization.
a. Log in to your virtual machine
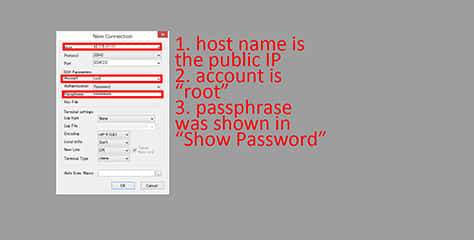
Using an SSH client such as Poderosa or other terminal software, log in to your virtual machine.
The host name is the Public ID, and your password was shown in the details of your virtual machine. Use “root” as the username.
Once the login is successful, the following screen will display.
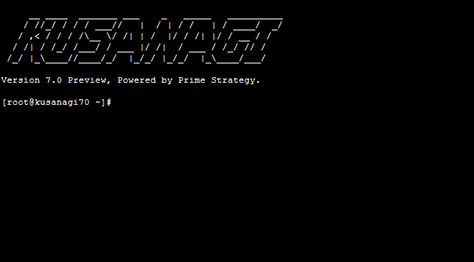
For instructions on initialization please see the following guide.