KUSANAGI for NIFTY Cloud is a free virtual machine image to run wordpress on NIFTY Cloud.
Recommended environment: memory over 4GB.
How to use KUSANAGI for NIFTY Cloud
※If you already have a NIFTY Cloud account,please log in (https://console.cloud.nifty.com/web/).
1.How to make a virtual machine image
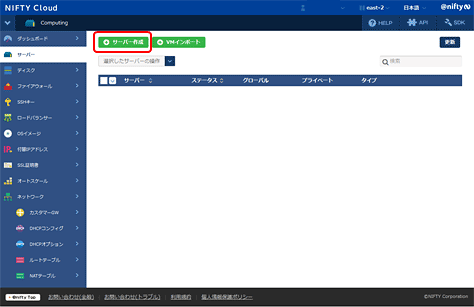
1-1 「KUSANAGI for NIFTY Cloud」Make a virtual machine image
Click the server menu button「サーバー」,and then click the button「サーバー作成」on the screen.
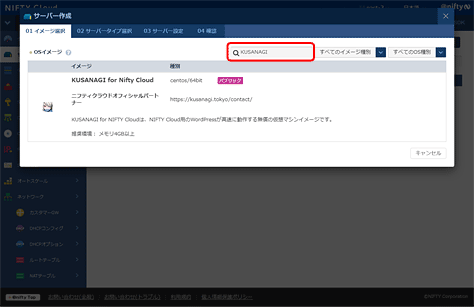
1-2 Select the OS image
OS image selection screen will come out and then please type in「KUSANAGI」in the search box.
KUSANAGI for Nifty Cloud will come out and then click.
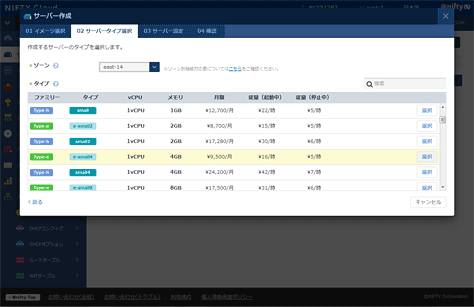
1-3 Select the server type
Select the zone and type(combination of vCPU and memory)and click the button (選択).The recommend environment of KUSANAGI for Nifty Cloud is over「e-small4」.
1-4 Type in the server information
Configure the server name,memo,pricing plan and SSH key.
Please type in server name( alphanumeric character 1~15)and memo( two-byte or one-byte less than 40 characters)that you can remember easily.for the pricing plan,we select 「従量」,that means you pay for what you use,click the + mark to create the SSH key .click the button「確認」after you type in all the information above

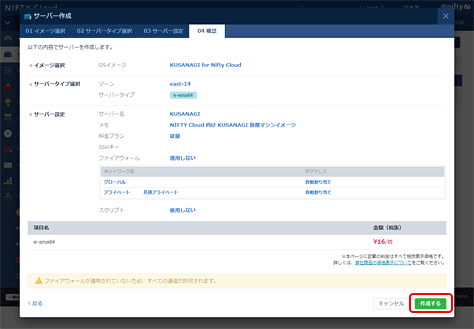
1-5 Confirm the configuration
The confirmation screen will come out,if there is no mistake,click the button「作成する」.
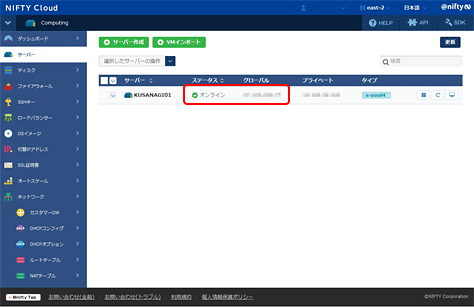
1-6 Virtual server completion
The server you created will be in the server list.
Wait for several minutes and then the status will change to 「オンライン」.
2.Log in the virtual machine and begin the initialization
Next we will tell you how to log in the virtual machine and begin the initialization.
2-1 Log in the virtual machine
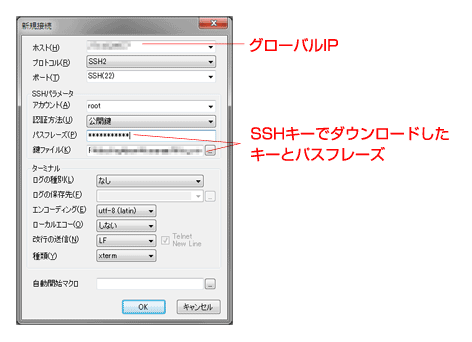
Use the SSH client like Poderosa or terminal soft to log in your virtual machine.
※Type in the global IP that you get from「1-6 Virtual server completion」for host(ホスト),and input root in the account(アカウント)place.select the public key(公開鍵)for the authentication method and then use the SSH key and passphrase you made at「1-4 Type in the server information」
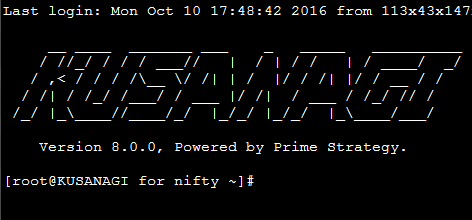
The screen below will come out if you succeed.
Click the button below to learn the procedures for KUSANAGI initialization.