KUSANAGI for GCP Business Edition is a virtual machine image that makes WordPress for Google Cloud Platform run at high speeds.
Recommended environment: 3.5 GB memory or more.
Using KUSANAGI for GCP Business Edition
*This guide assumes that you have a Google account, and can access the Google Cloud Platform portal.
1. Deploy a VM from the Marketplace
The KUSANAGI for GCP Business Edition VM image is available on the Marketplace. First, we will choose KUSANAGI for GCP Business Edition from the Marketplace, and explain how to deploy the VM.
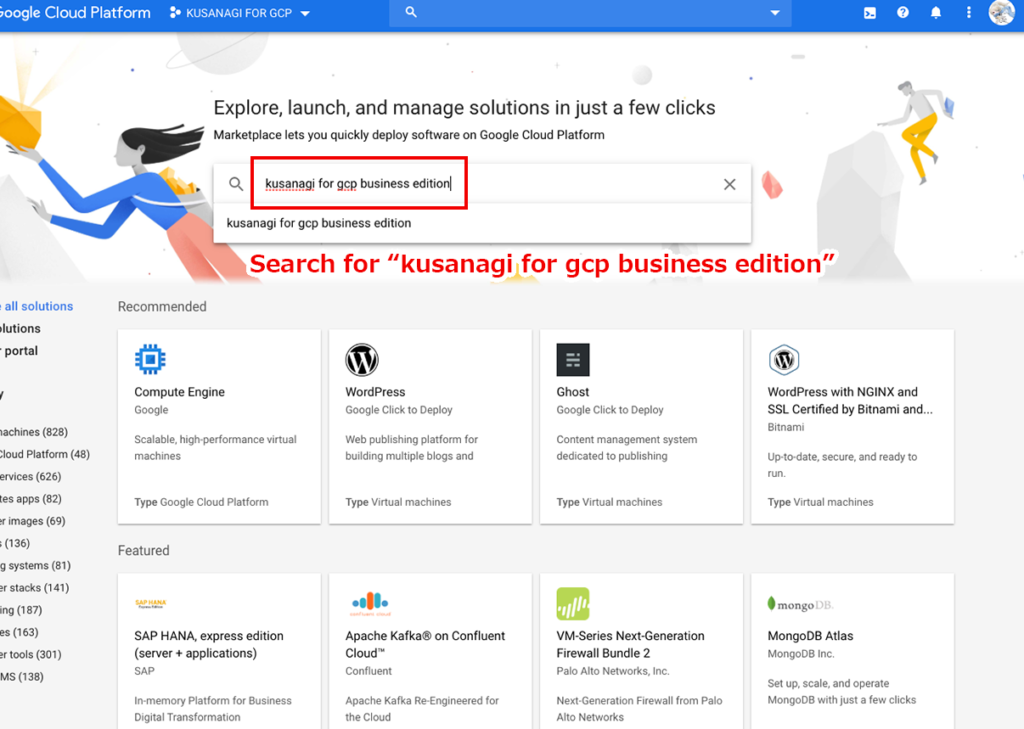
Search for a VM image on the Marketplace
On the Google Cloud Platform page, and enter “kusanagi” on the search screen.
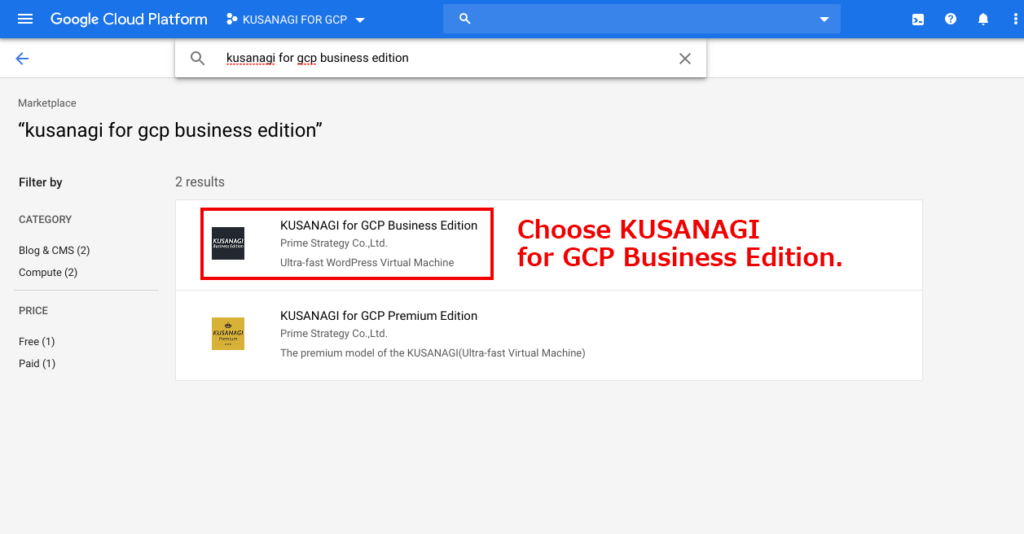
Choose KUSANAGI for GCP Business Edition from the search results.
Create the image
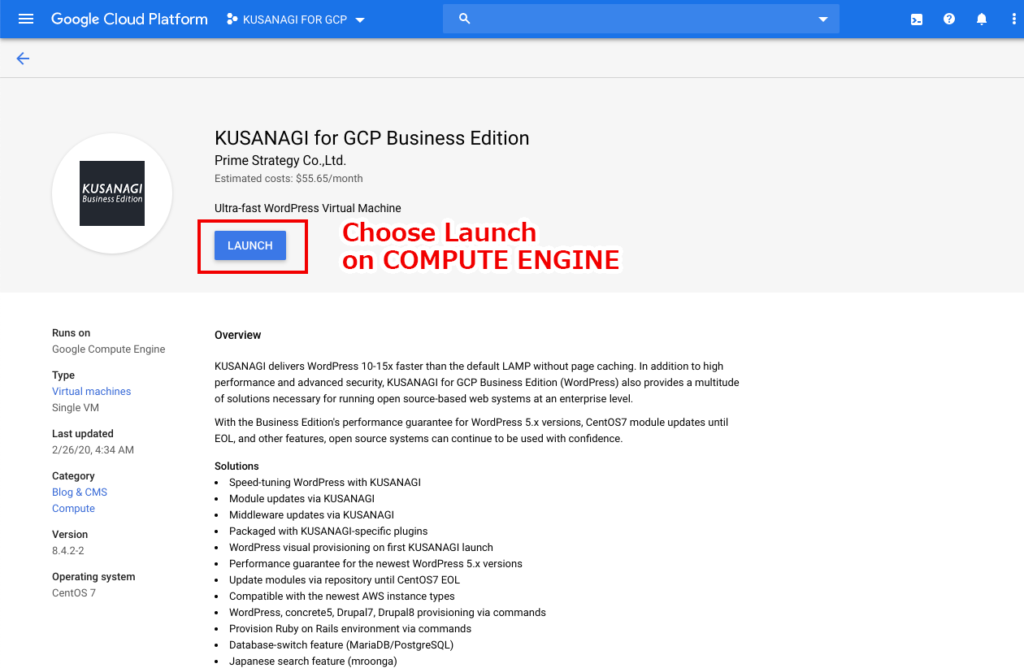
On the following screen, click Launch on Compute Engine.
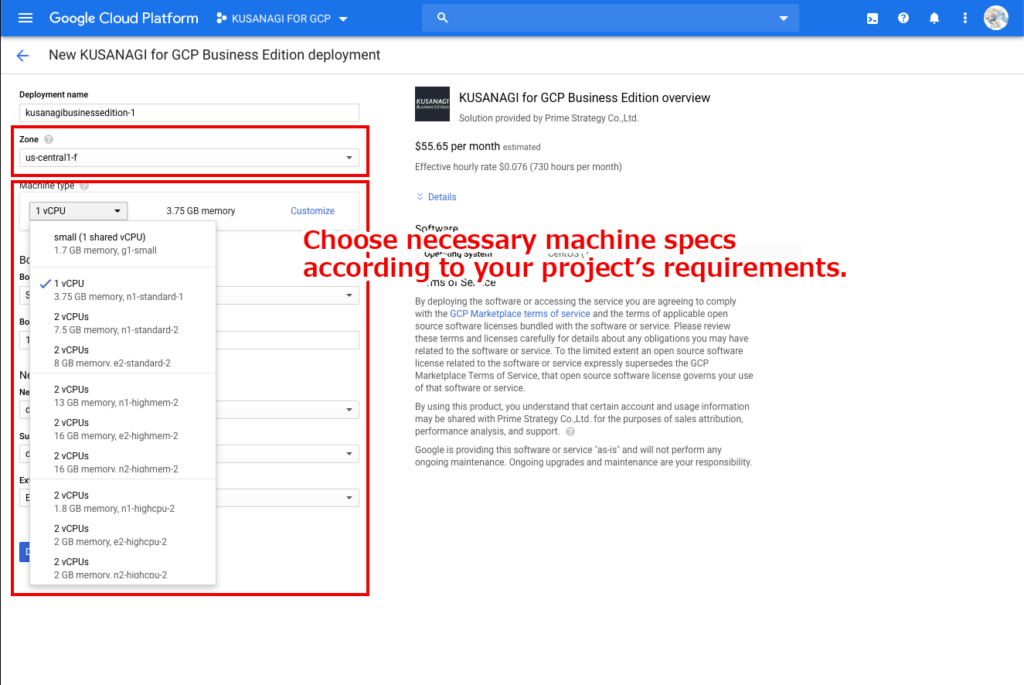
1. Choose a name for your KUSANAGI Business Edition instance.
2. Choose a machine type with at least 4GB memory.
3. Fill the rest of the values according to your project’s needs.
4. Click Deploy
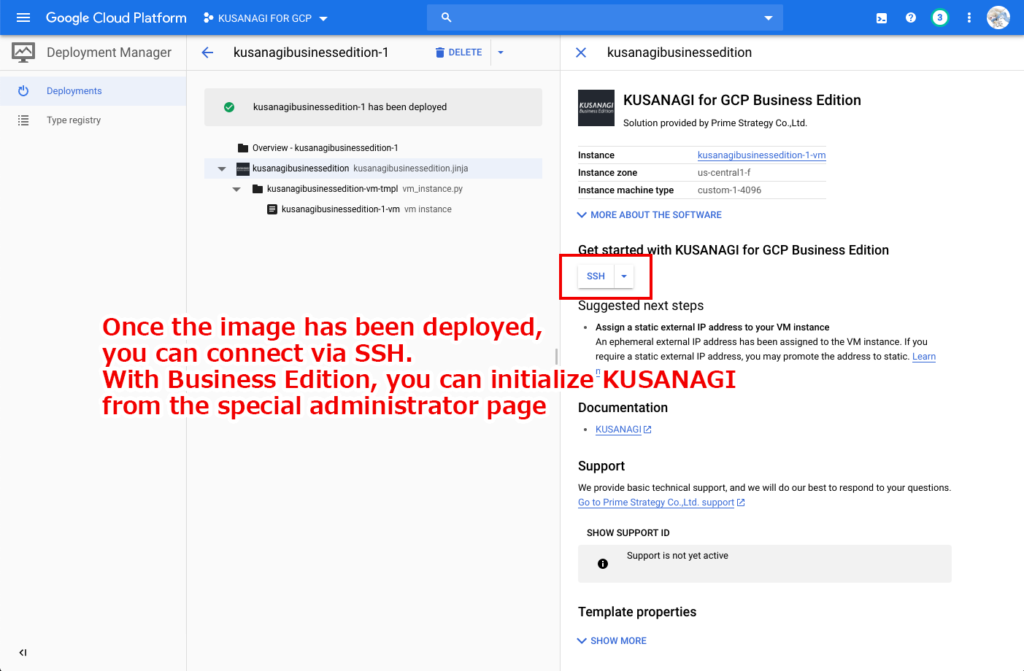
Once the VM has been deployed, click the SSH button to connect to the instance from the console.
You can use can initialize KUSANAGI from the KUSANAGI Business Edition administrator page. We will explain this in the next step.
2. Configuring WordPress launch settings from the initialization screen
Choose Resource → Compute Engine on the console, and copy the public external IP for your instance.
Navigate to the IP address by accessing it from your browser’s address bar.
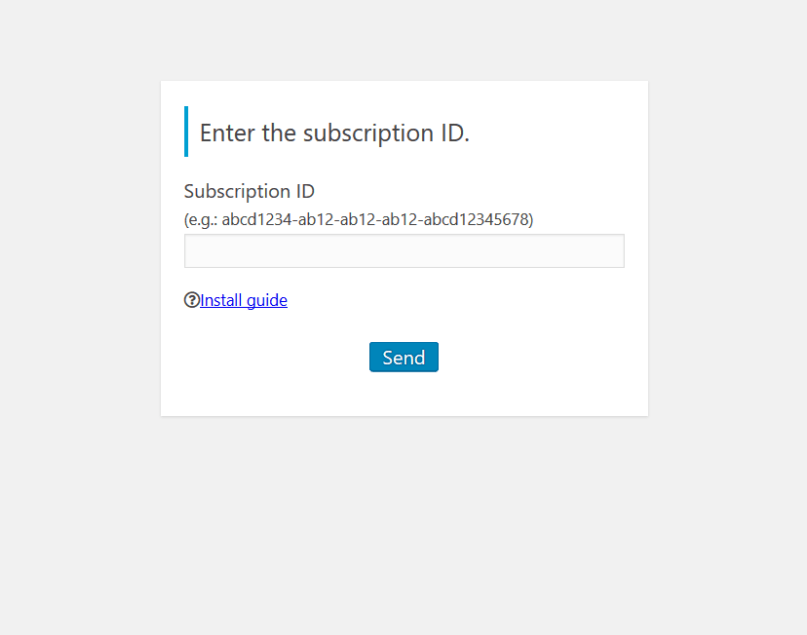
Click your instance name to go to the VM instance details page, and find the Instance id. Paste it into the input field and click Send.
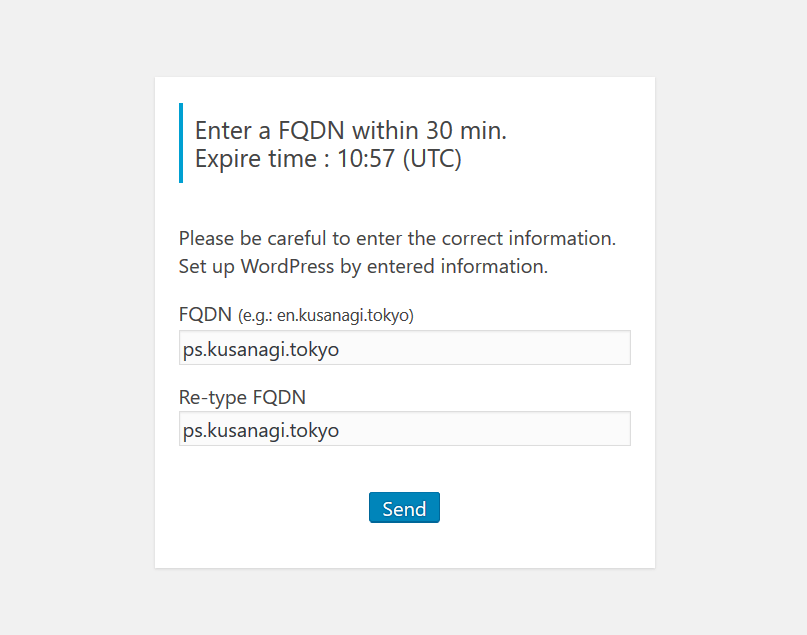
Enter your FQDN information on the next screen and click Send.
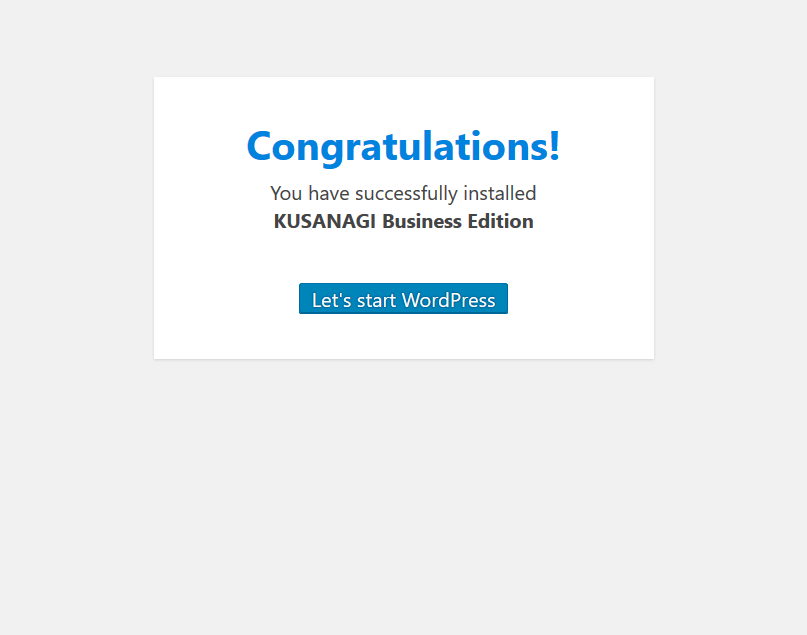
Start KUSANAGI setup, and after it finishes, click the Let’s Start WordPress button on the Congratulations! screen.
*In order to access the web site, you will need to configure the DNS for your IP address and FQDN.
Please refer to the following document for the procedure after the initial setup of KUSANAGI.