Amazon Web Services
KUSANAGI for AWS is a free virtual machine image built to execute WordPress at high speeds on Amazon Web Services.
System requirements: at least a t.2medium instance (minimum 4GB memory)
If you want to use for KUSANAGI for enterprise, KUSANAGI for AWS Business Edition is here:
KUSANAGI for AWS Business Edition
How to use KUSANAGI for AWS
* This guide assumes you have an account with AWS and are able to access the AWS Management Console.
1. Obtain the virtual machine image
Obtain the image for KUSANAGI for AWS from AWS Marketplace and make it ready for use on Amazon Web Services.
* AWS Marketplace is an online store for finding and purchasing software and services that can be executed on AWS. KUSANAGI for AWS is available on AWS Marketplace.
a. Browse AWS Marketplace
You can browse AWS Marketplace from the Management Console.
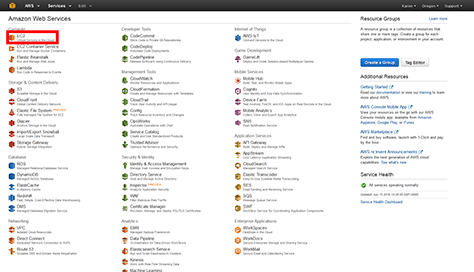
Once you log in you will see the above screen. Click “EC2”.
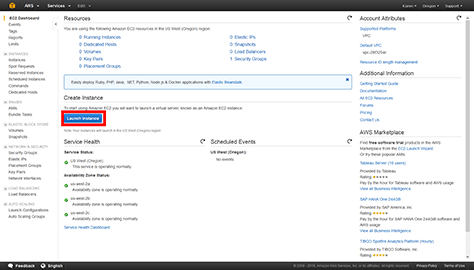
Click “Launch Instance”.
“Step 1: Choose an Amazon Machine Image (AMI)” screen will display.
b. Select an image
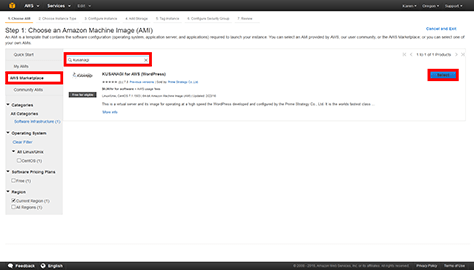
- On the left menu click on “AWS Marketplace”.
- Search for “kusanagi”.
- Confirm that KUSANAGI for AWS appears and click “Select” on the right.
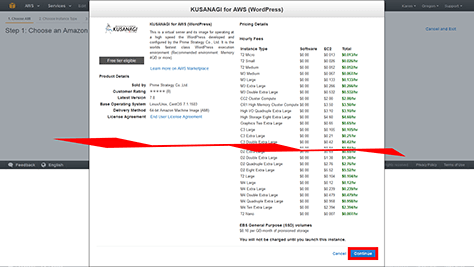
The product details for will display. Click “Continue” on the bottom right.
c. Step 2: Choose an Instance Type
You will select the instance type you will use for your selected virtual machine image.
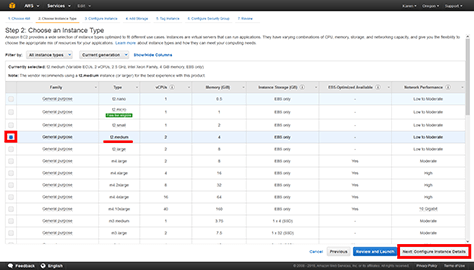
- From Type, select t2.medium.
* KUSANAGI requires at least 4GB of memory so we suggest t2.medium. - On the bottom right, click “Next: Configure Instance Details”.
d. Step 3: Configure Instance Details
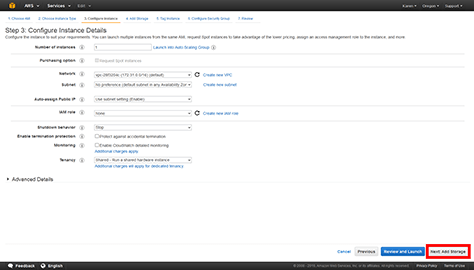
Click “Next: Add Storage”.
e. Step 4: Add Storage
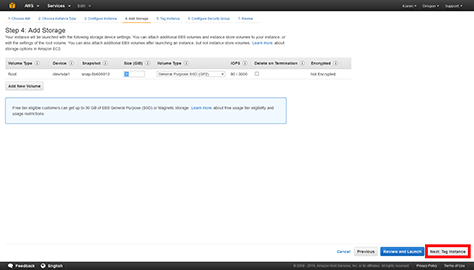
Click “Next: Tag Instance”.
f. Step 5: Tag Instance

Click “Next: Configure Security Group”.
g. Step 6: Configure Security Group
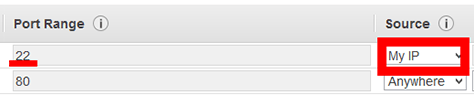
In order to strengthen security, change the SSH port source (port range of 22) to My IP, and you can designate the IP address you are currently using.
※If current connection Ip address specifics in range, leave SSH port source to custom settings in CIDR. Add SSH rules in My IP in case of you couldn’t specific the range. Delete it after you done.
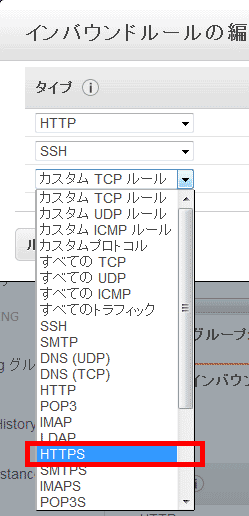
Select HTTPS by add rules and save to available to shows in SSH.
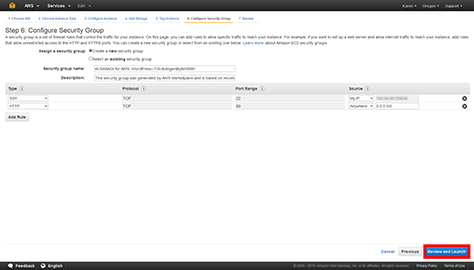
Click “Review and Launch”.
h. Step 7: Review Instance Launch
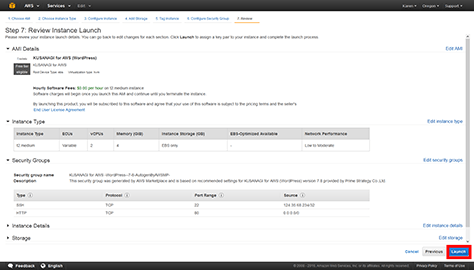
Confirm all the details then click “Launch” on the bottom right.
i. Create and download a key pair
When you click on “Launch”, the key pair window will display.
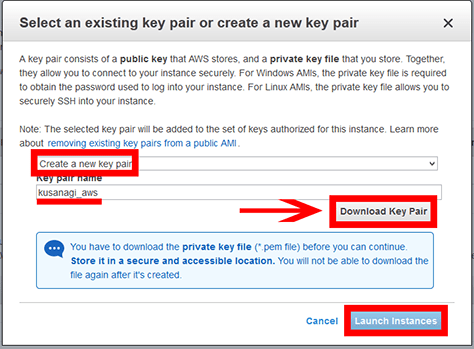
Select “Create a new key pair”, and enter any name for it. Then click “Download Key Pair”.
Confirm that your key pair has been downloaded successfully and click “Launch Instances”.
The creation of your virtual machine image is now complete.
2. Activate virtual machine
The activation of your virtual machine will begin.
a. Displaying your instance
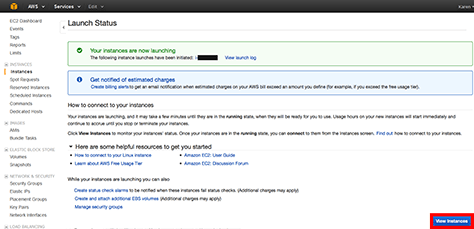
The “Launch Status” screen will be displayed so click “View Instances” when it appears.
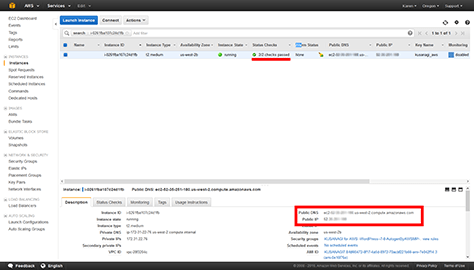
Once the status has changed to “2/2 checks passed” the creation of your instance is complete. If you click on your new instance, on the bottom of your screen you can see various details. Make note of the Public DNS and the Public IP.
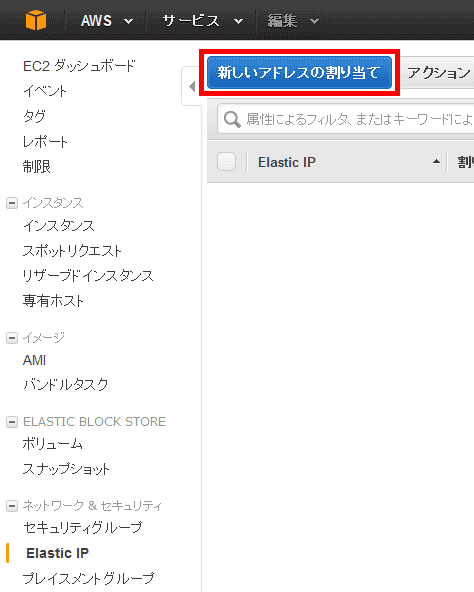
3. Elastic (static IP) settings
3-1. Assign an Elastic IP Address to Your Instance. Click[Elastic IP]and click [Assign New Elastic IP Address] in Amazon Website Services management console menu to assign an Elastic IP Address to your Instance.
3-2. Click [Action] pull down’s and select [Access to Address]to assign an Elastic IP Address to your instance by instance log.

4. Log in to the virtual machine and prepare for initialization
Below we will explain how to log in to your virtual machine in preparation for initialization.
a. Log in to your virtual machine
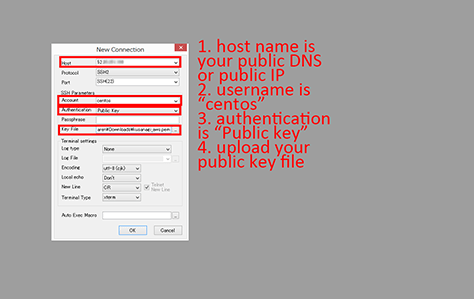
Using an SSH client such as Poderosa or other terminal software, log in to your virtual machine.
The host name is your Public DNS or Public IP. The account is “centos”, and the authentication type is “Public key”. In “Key file”, please upload your key pair that was downloaded earlier.
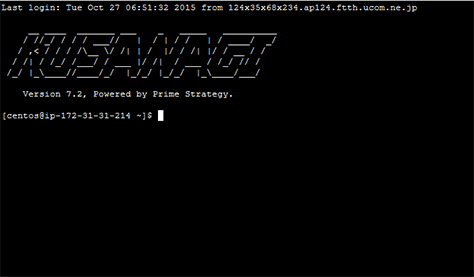
Once the login is successful, the following screen will display.
b. Switch to the root user
Enter the following to switch to the root user.
$ sudo su -
Check that you are the root user.
[root@<hostname> ~]#
If the command prompt ends in # you have successfully switched to the root user.
For instructions on initialization please see the following guide.