KUSANAGI for AWS Premium Edition is the premium model of the ultrafast CMS execution environment KUSANAGI.
Its biggest feature is the implementation of the web system speed tuning engine WEXAL® Page Speed Technology. Through multi-tiered optimization of the backend, network and frontend, this technology speeds up page loading, improves Google PageSpeed Insights score, and makes advertisements load faster. As a result, one can expect both page views and conversion rates to increase as well.
An open source system that offers reliability in continued use, KUSANAGI for AWS Premium Edition has the necessary features for business users: operation guarantee for the latest WordPress 5.x versions, module updates from the repository until CentOS7 EOL, compatibility with the major new WAS instance types, and more.
Using KUSANAGI for AWS Premium Edition
This guide will explain how to use KUSANAGI for AWS Premium Edition, and assumes that you already have an AWS account, and that you can access the AWS Marketplace and AWS Management Console.
1. Create a (VM) instance using the AWS Management Console
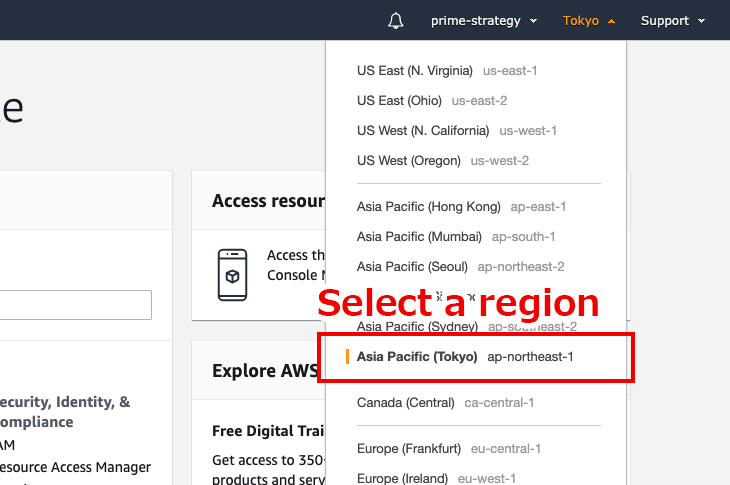
1-1.Access the AWS Management Console and choose a region from the menu in the upper right hand corner.
*For this guide, we will use the Asia Pacific (Tokyo) region for our image.
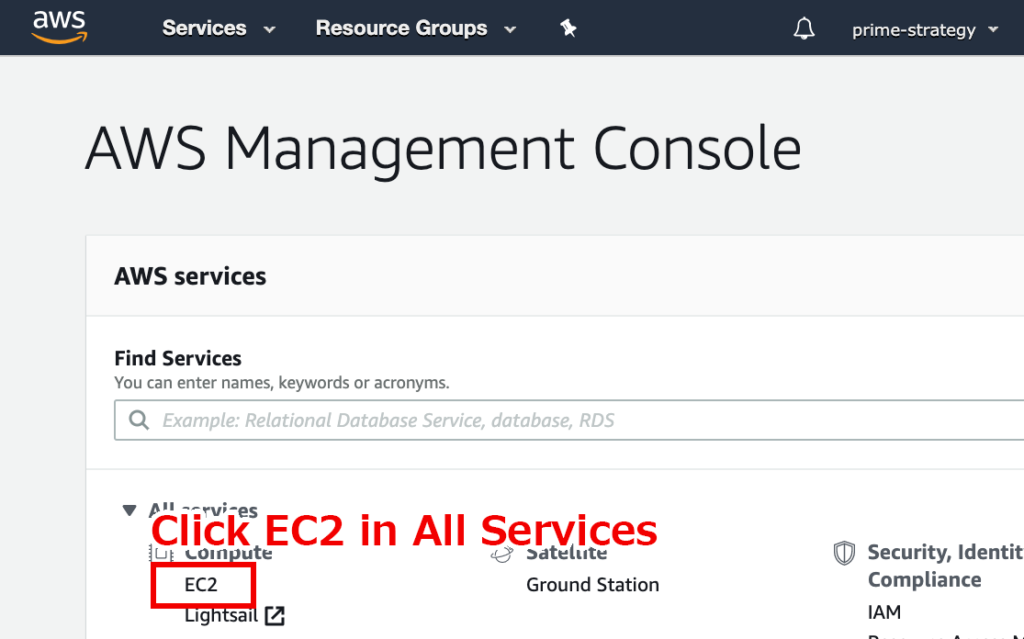
1-2.Click on EC2 to show the EC2 console.
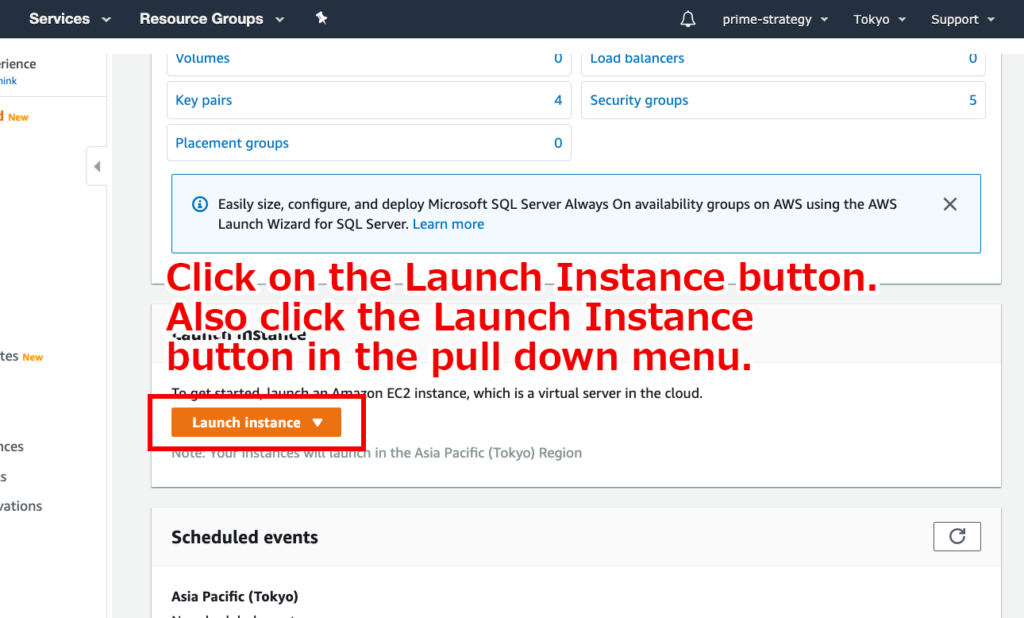
1-3.Click Launch Instance from the EC2 console.
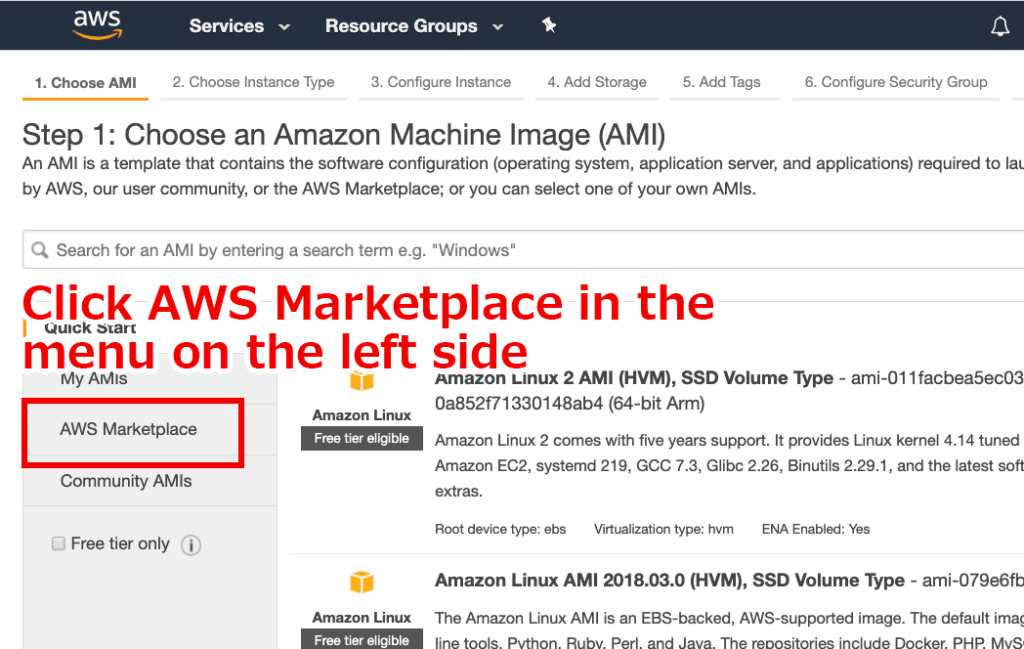
1-4.Click AWS Marketplace in the menu on the left side of the Step 1: Choose an Amazon Machine Image (AMI) page to show the AWS Marketplace.
1-5. Type KUSANAGI into the search bar, and click Select to the right of KUSANAGI for AWS Premium Edition.

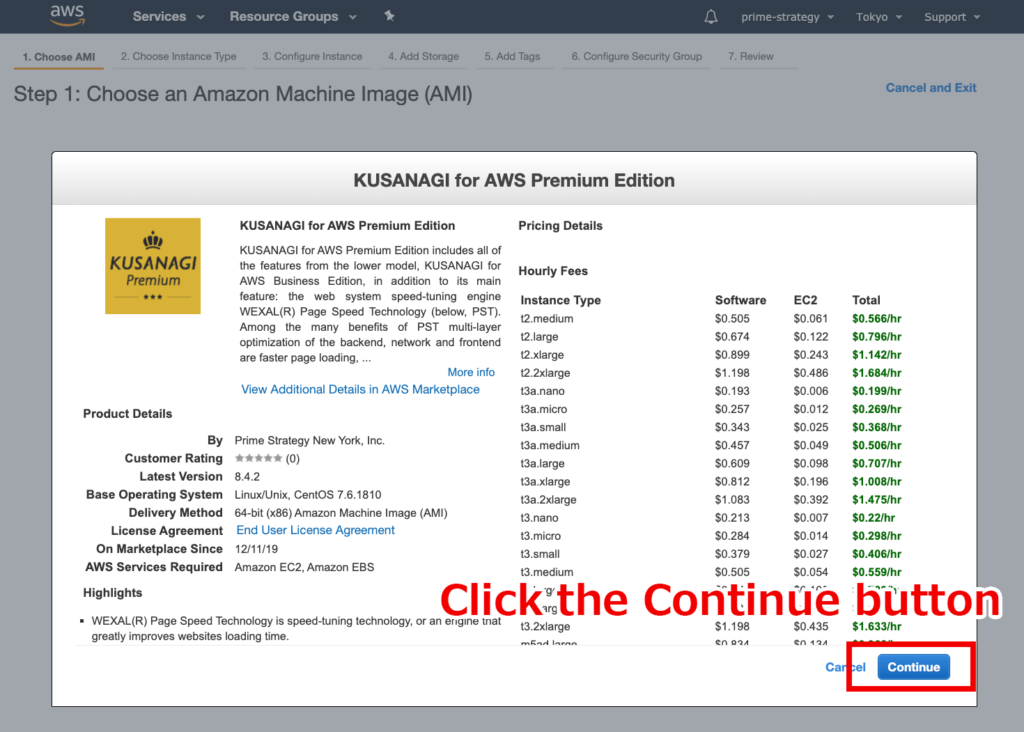
1-6. This will show the details page for KUSANGI for AWS Premium Edition. Click the Continue button on the bottom right. You will be brought to the Step 2: Choose an Instance Type page.
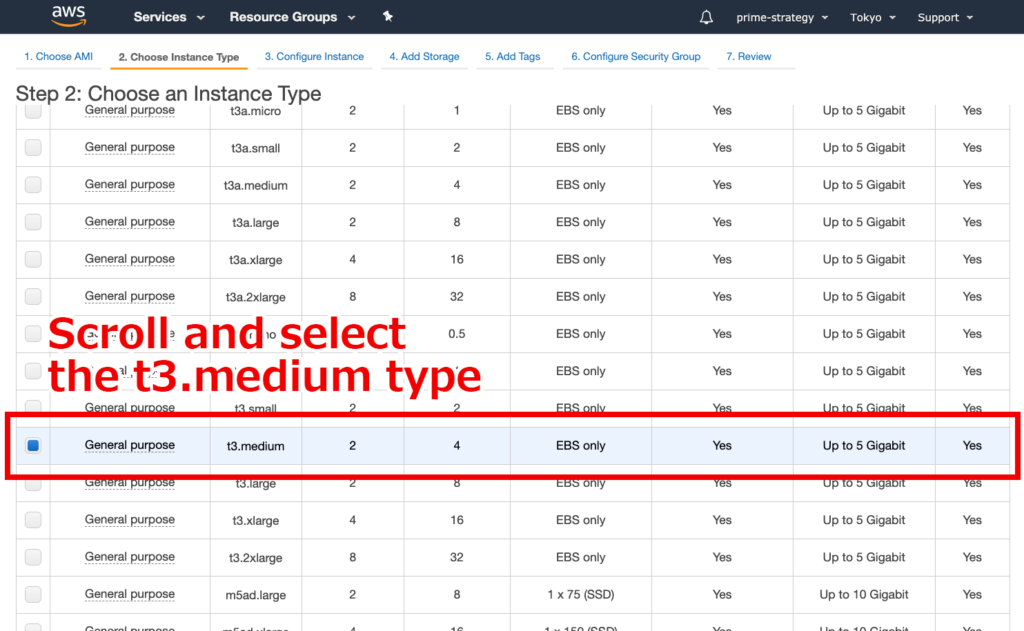
1-7.Choose a type (4GiB memory. KUSANAGI recommended environment is 4Gb or more.) For this example, we will use the 4GiB instance “t3.medium.”
1-8. Click Next: Configure Instance Details on the bottom right. This will bring you to the Step 3: Configure Instance Details page.

1-9. Click Next: Add Storage on the bottom right. This will bring you to the Step 4: Add Storage page.

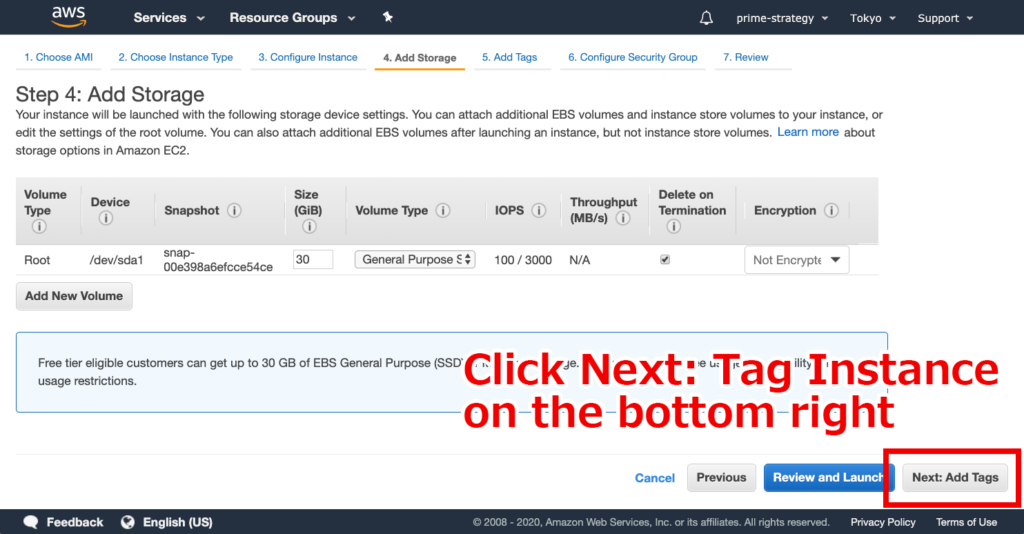
1-10.Click Next: Tag Instance on the bottom right. This will bring you to the Step 5: Tag Instance page.
1-11.Click Next: Configure Security Group on the bottom right. This will bring you to the Step 6: Configure Security Group page.
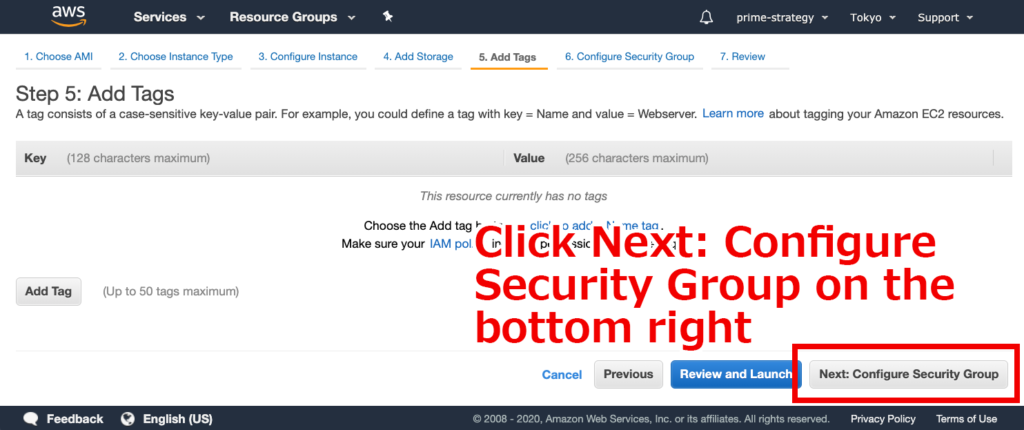
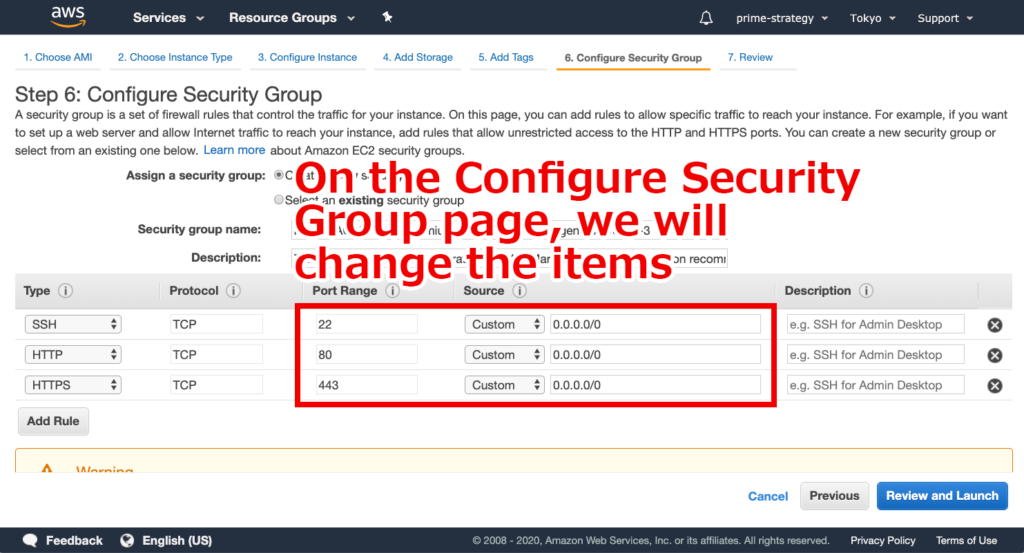
1-12. On the Configure Security Group page, we will change the items marked in red to strengthen security.
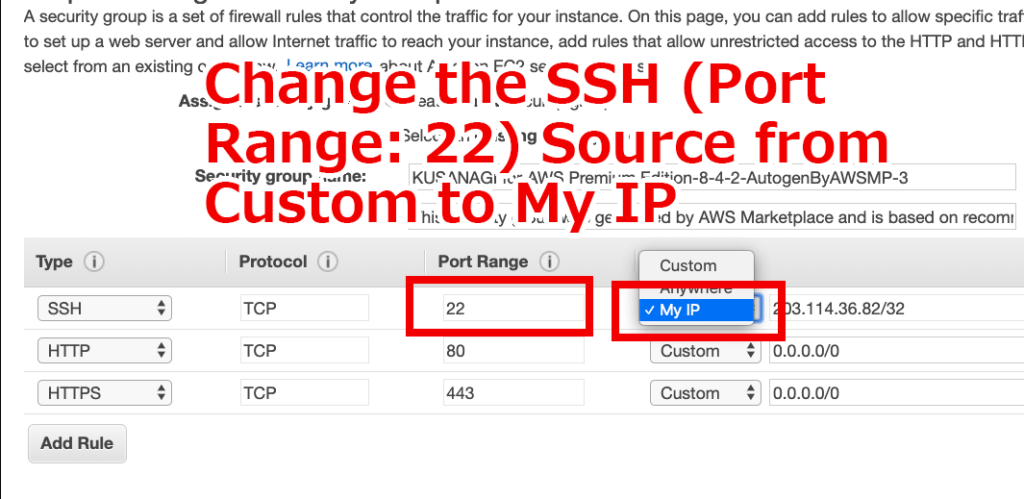
Change the SSH (Port Range: 22) Source from Custom to My IP. This will select the IP address currently being accessed.
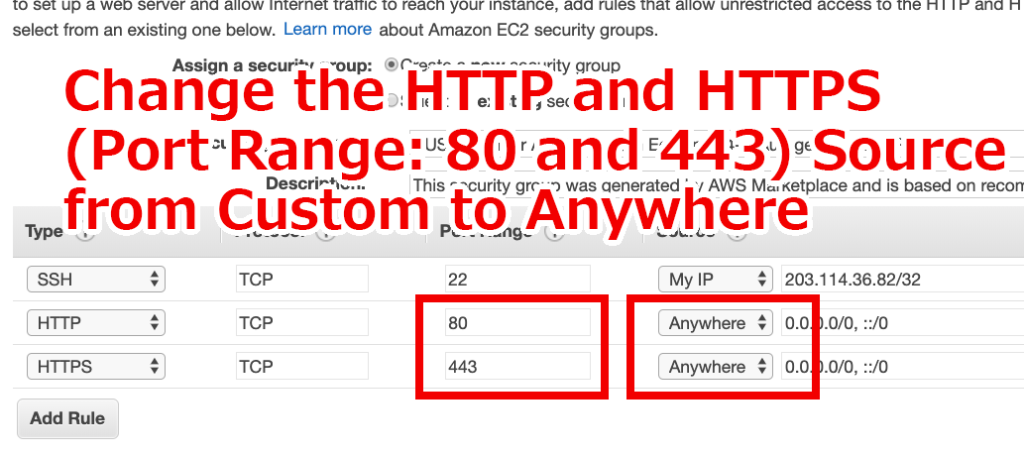
1-12-3. Change the HTTP and HTTPS (Port Range: 80 and 443) Source from Custom to Anywhere.
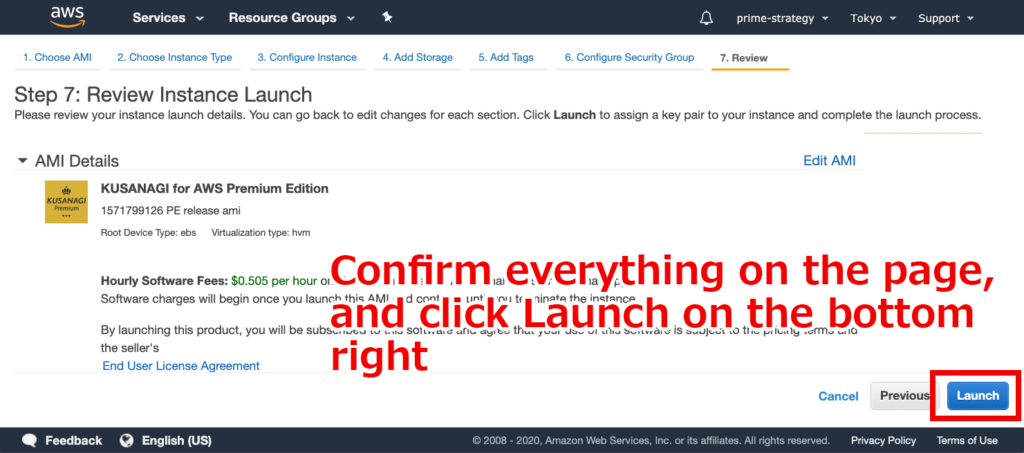
1-13.Click Review and Launch on the bottom right of the screen. You will be brought to the Step 7: Review

1-14. Confirm everything on the page, and click Launch on the bottom right. This will bring up the “Select an existing key pair or create new key pair” window.
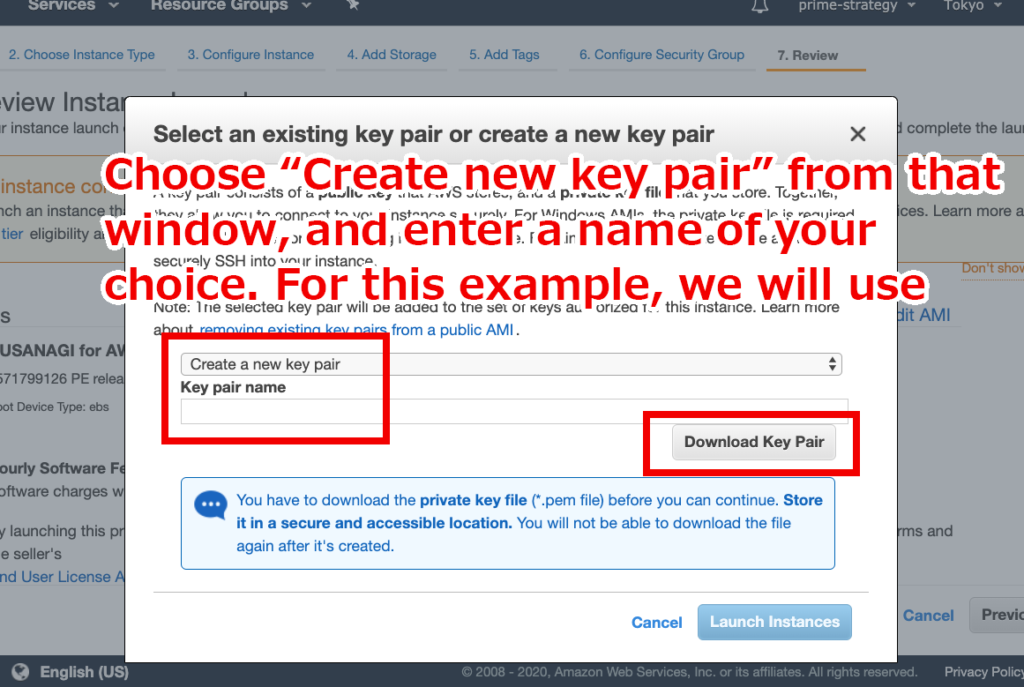
1-15. Choose “Create new key pair” from that window, and enter a name of your choice. For this example, we will use kusanagi_aws_premium. After inputting, click Download Key Pair.
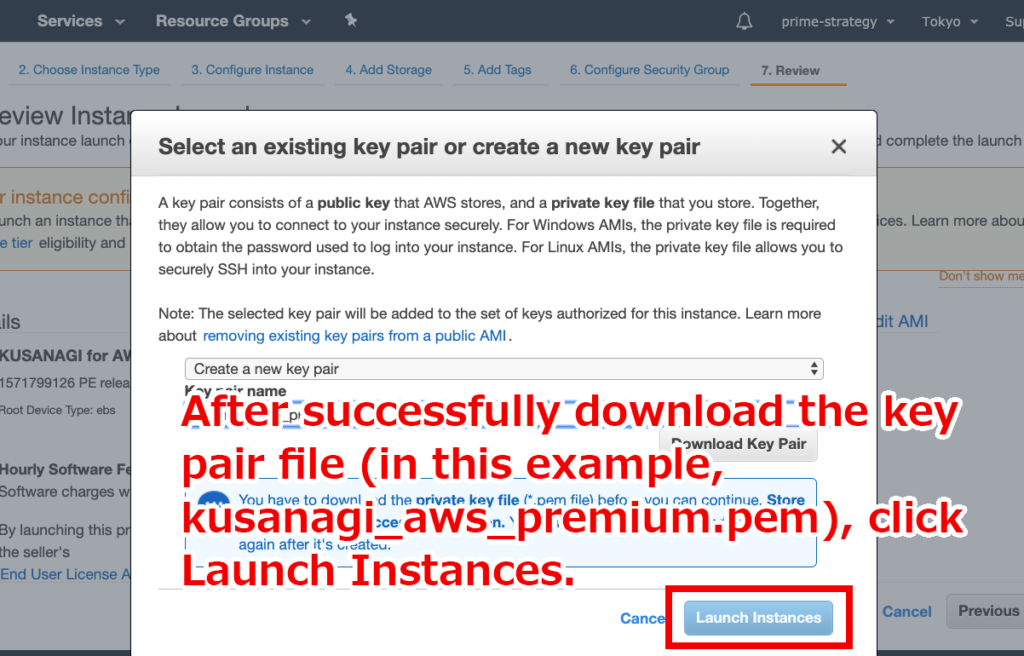
1-16. After successfully download the key pair file (in this example, kusanagi_aws_premium.pem), click Launch Instances. You will move to the Launch Status page.
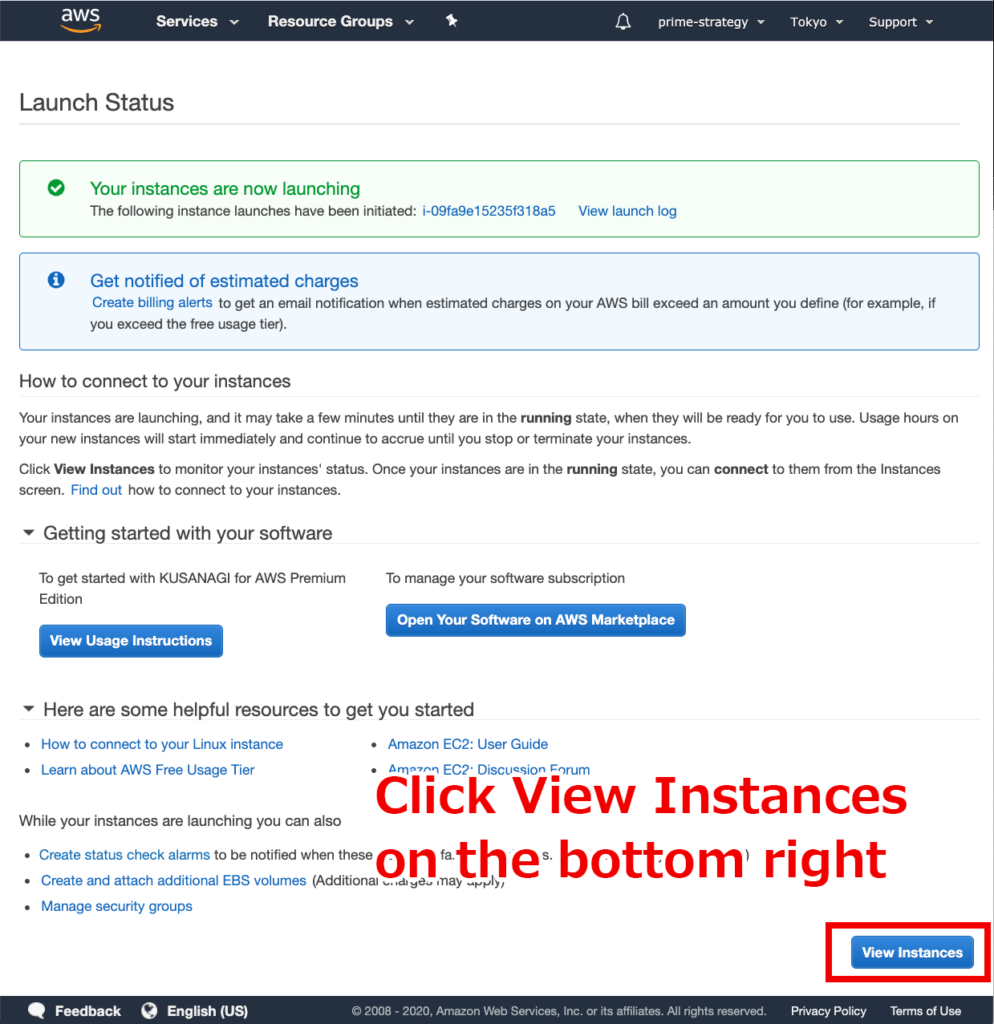
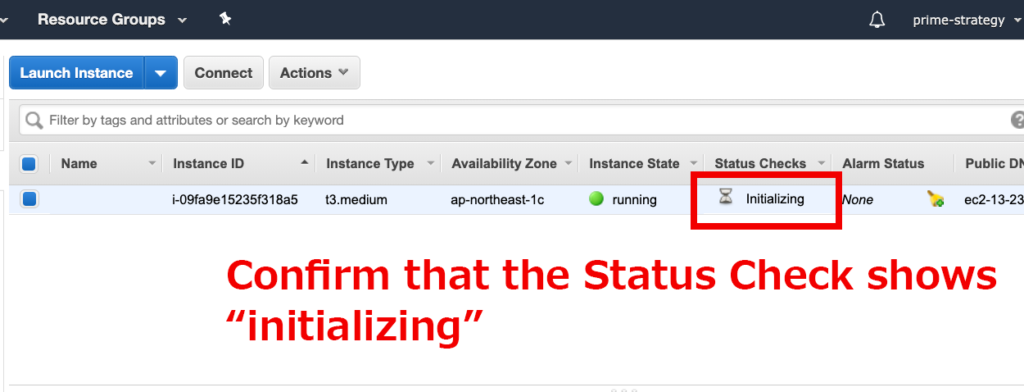
1-17. Click View Instances on the bottom right. You will be brought to the instance page.
You can confirm that the Status Check shows “initializing”, and that the instance is being launched.
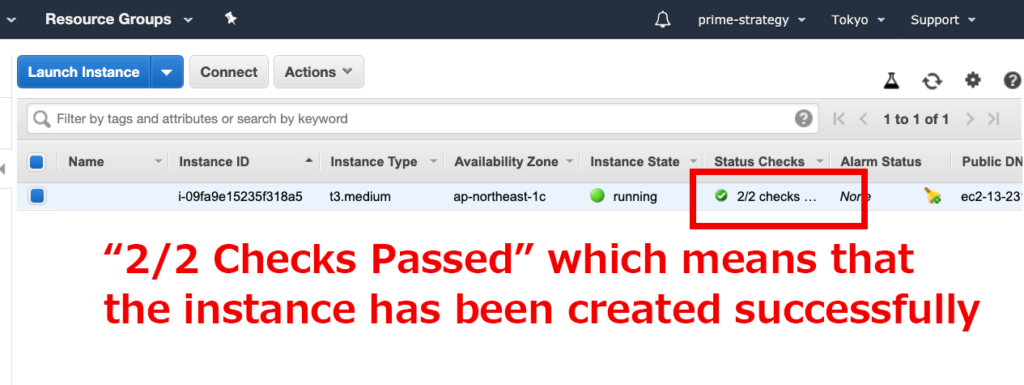
After a while, the Status Check value will change to “2/2 Checks Passed” which means that the instance has been created successfully.
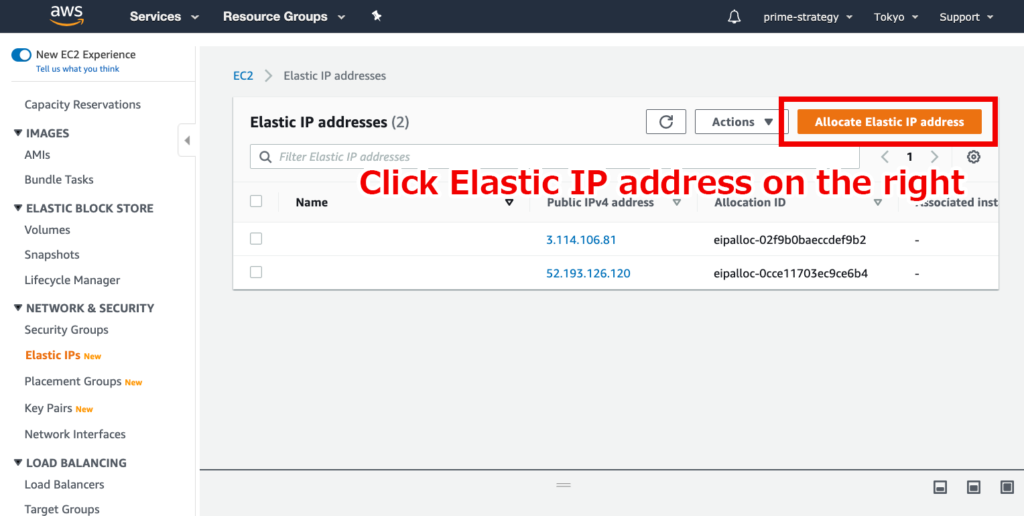
2. Elastic IP (static IP) settings
The IP assigned to the EC2 instance that we created changes automatically on every launch. If you want to keep a specific IP, use Elastic IP to assign an address and associate it.
Click Elastic IP on the left sidebar.

Click Elastic IP address on the right
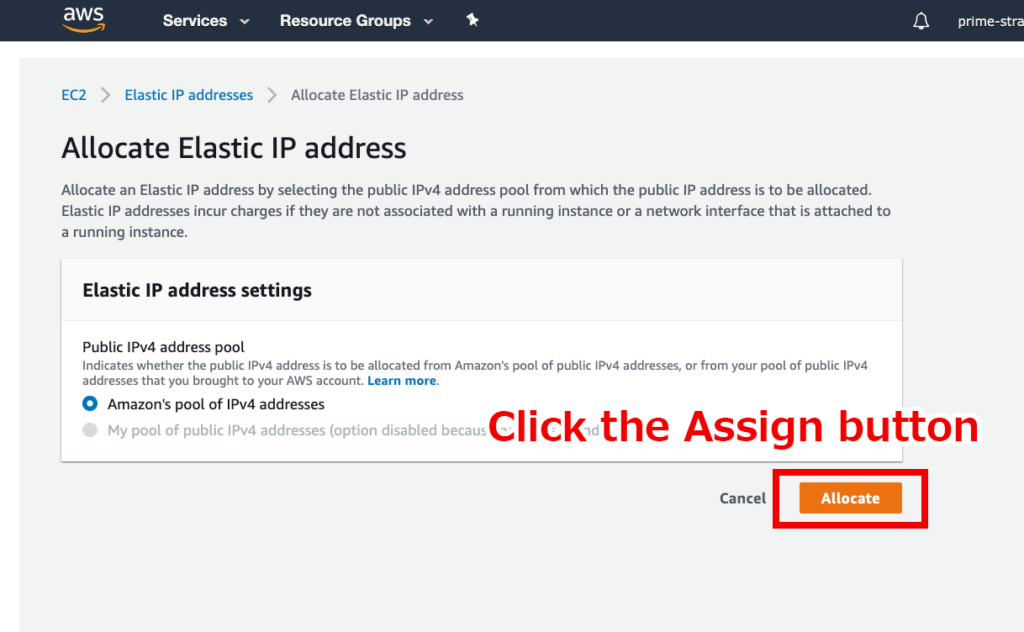
2-2.Click the Assign button.
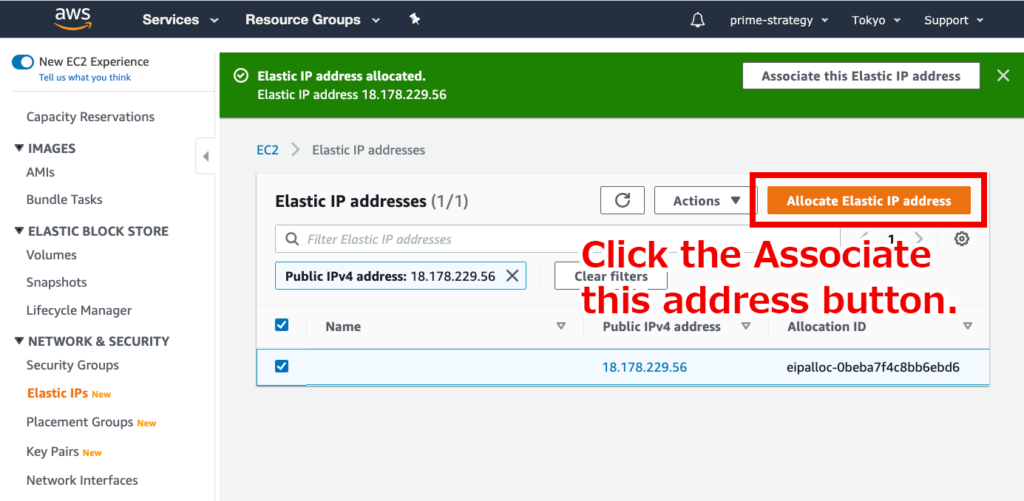
2-3. Click the Associate this address button.
2-4.Select the Instance and Private IP Address. (Clicking will allow selection from the pull-down menu).
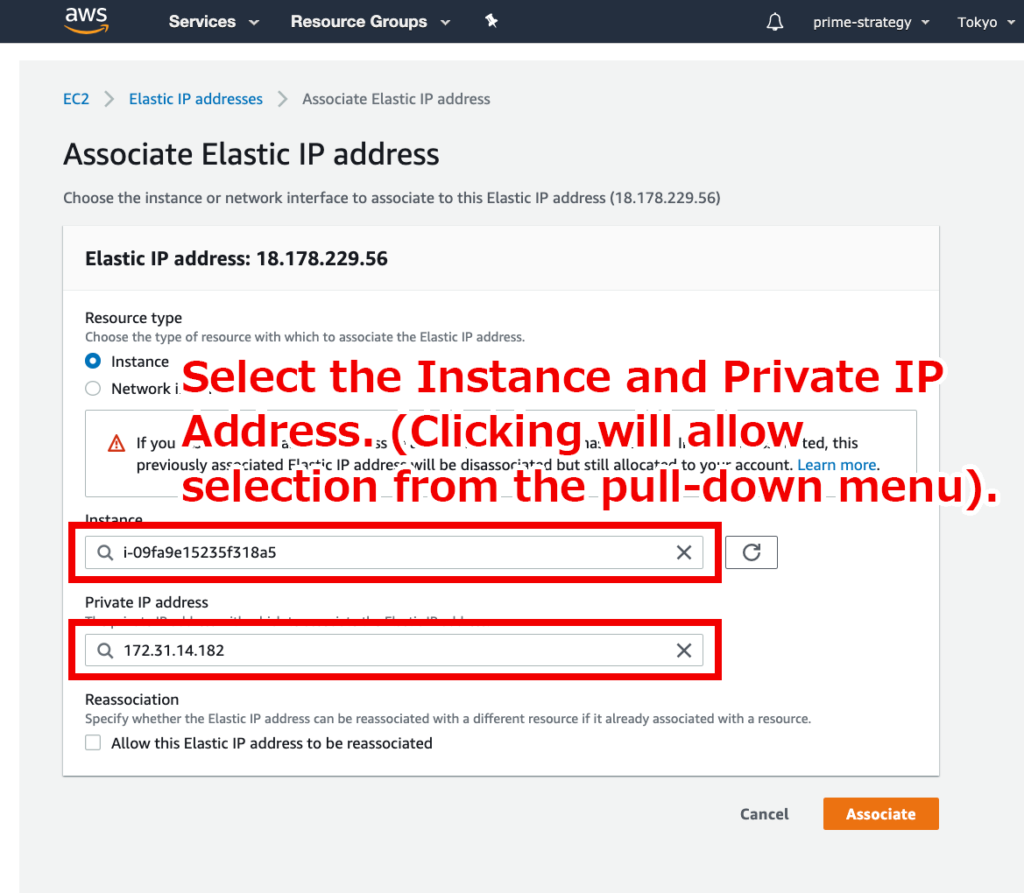
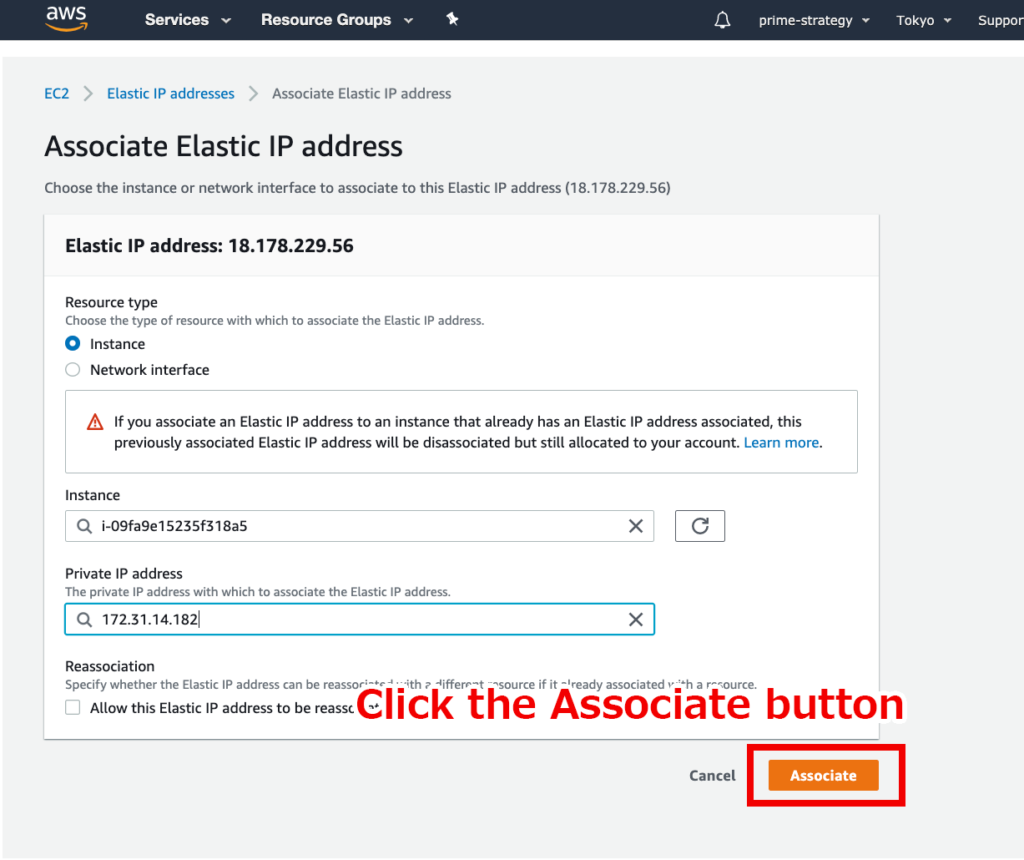
After selecting, click the Associate button.
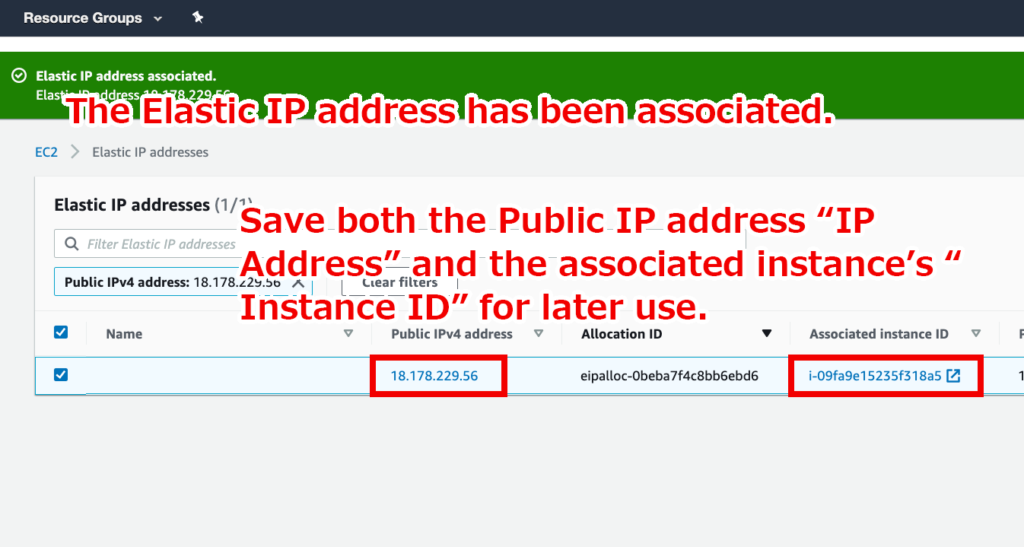
2-5.The Elastic IP address has been associated. Save both the Public IP address “IP Address” and the associated instance’s “Instance ID” for later use.
3. Configuring WordPress launch on the initialization screen
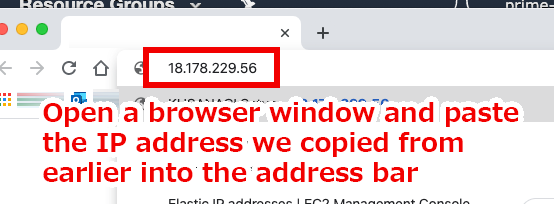
3-1.Open a browser window and paste the IP address we copied from earlier into the address bar. (E.g. http://publicIP)
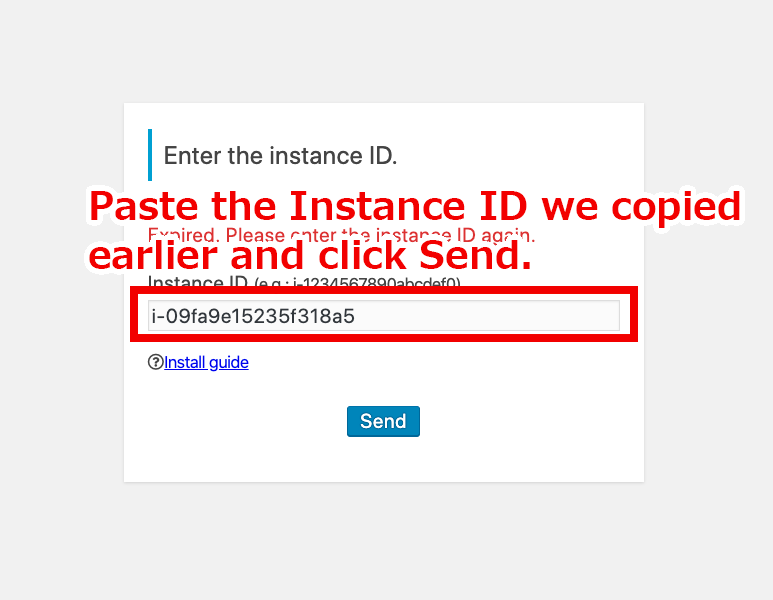
3-2.The Instance ID input screen will display, so paste the Instance ID we copied earlier and click Send.
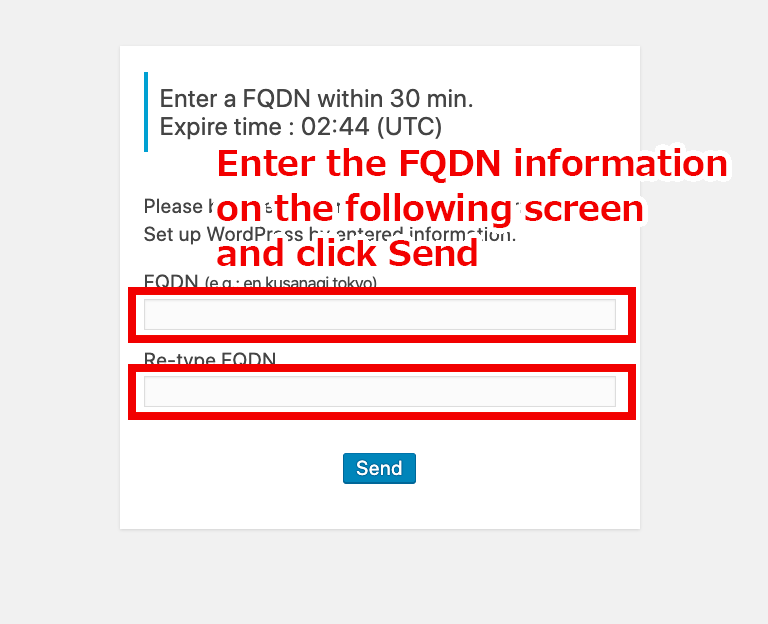
3-3.Enter the FQDN information on the following screen and click Send.
*Enter your own domain information
3-4.KUSANAGI setup will begin.

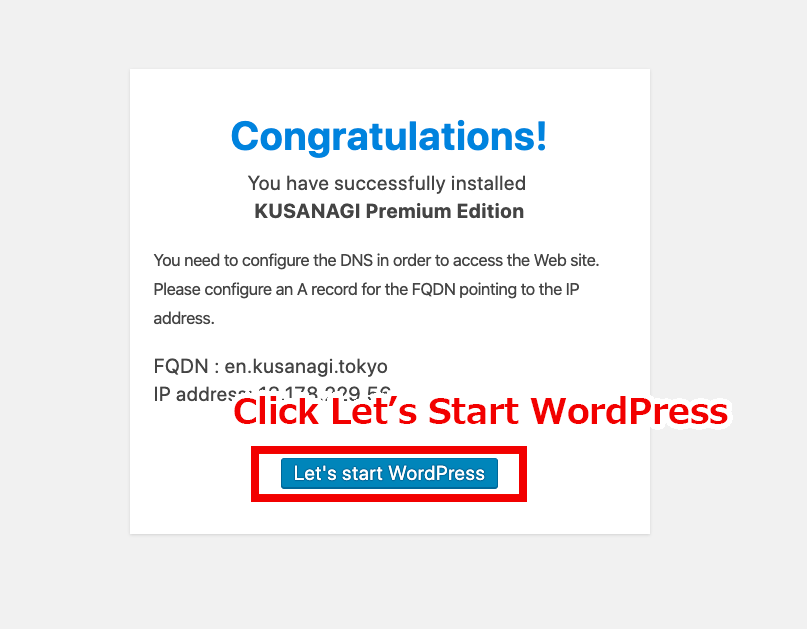
3-5.After the KUSANAGI setup is complete, the Congratulations! Screen will dsiplay. Click Let’s Start WordPress.
3-6.Access the domain you used from the FQDN information step, and WordPress installation will begin.
